Articles -Plaster and Arching correction
Plaster Cast and Arching Correction in Violin Restoration
The Wedge Vacuum Method
- Introduction
- Preparation
- The Wedges
- The Vacuum Box
- Pouring the Plaster
- Drying Plaster, the Mineral Layer
- The Base Plate
- Correct the Plaster Cast
- Pressing the Plate
1. Introduction: The Wedge Vacuum Method
Centuries of longitudinal string pressure have left their traces on the arching of many antique violins. Factors such as longitudinal string- and sound post tension, and excessive bass bar strain have contributed to arching deformation. Examples like a sunken bridge area, leaving the arching in a two-humped camel shape and arching distortion caused by previous repair (ill-fitting patches for instance) are very common.
The method described in this article uses pressure to correct the arching depressions, and a vacuum box aiming to provide perfect adhesion of a protective separation layer between the violin plate and the plaster.
This approach has major advantages in comparison with more conventional methods,especially in cases when the violin has open cracks or areas without varnish. With this method it is not necessary to apply oil (to stick plastic or metal foil to the plate), which could otherwise penetrate the wood.
The second main advantage is that, thanks to the relative thinness of cling film, we are able to achieve a far more precise cast than we possibly could using a latex sheet, for example, as a separation layer.
Apart from being minimally invasive and having a very small likelihood of error, this method provides a straightforward way to correct sunken archings. At the same time we conserve the original characteristics of the violin, such as tool marks and other small imperfections, which will still be present in the finished plaster mould.
When using traditional arching correction methods like a plaster modification of a negative or positive cast, we incur the risk of losing some of the original characteristics in the process. By just cutting down raised areas of a positive or negative plaster replica, there is a danger of the result being an over-idealisation of the arching.
When one side of an arching is compressed, the other side automatically rises. In this method we are using the opposite effect to our advantage, in correcting the raised points in the arching by elevating the sunken areas. Delicate points such as the f-wing areas can simply be pushed up with a wedge. This method requires considerably less time to restore an arching. A deformation of only a few tenths of a millimetre would usually require work on extensive areas of the arching and the removing of a lot of material.
Most of the equipment required is already present in the majority of workshops, so this method can even be used by restorers who would only occasionally use a plaster cast.
2. Preparation
Clean the violin plate of any dirt. In case you are planning to remove polish do so before casting. Close the f-holes of the violin plate by gluing paper to them from the inside. Prepare a plywood board on which to glue the violin plates. The board should have long holes through which the wedges will be inserted. Spot-glue the plate to the board using hide glue and small sheets of paper in between. The paper will tear when removing the violin plate leaving the latter unharmed. Fig. 1 illustrates the holes in the board, and the violin plate glued in place. If the plate becomes unglued while inserting the wedges, re-glue it with more glue spots.
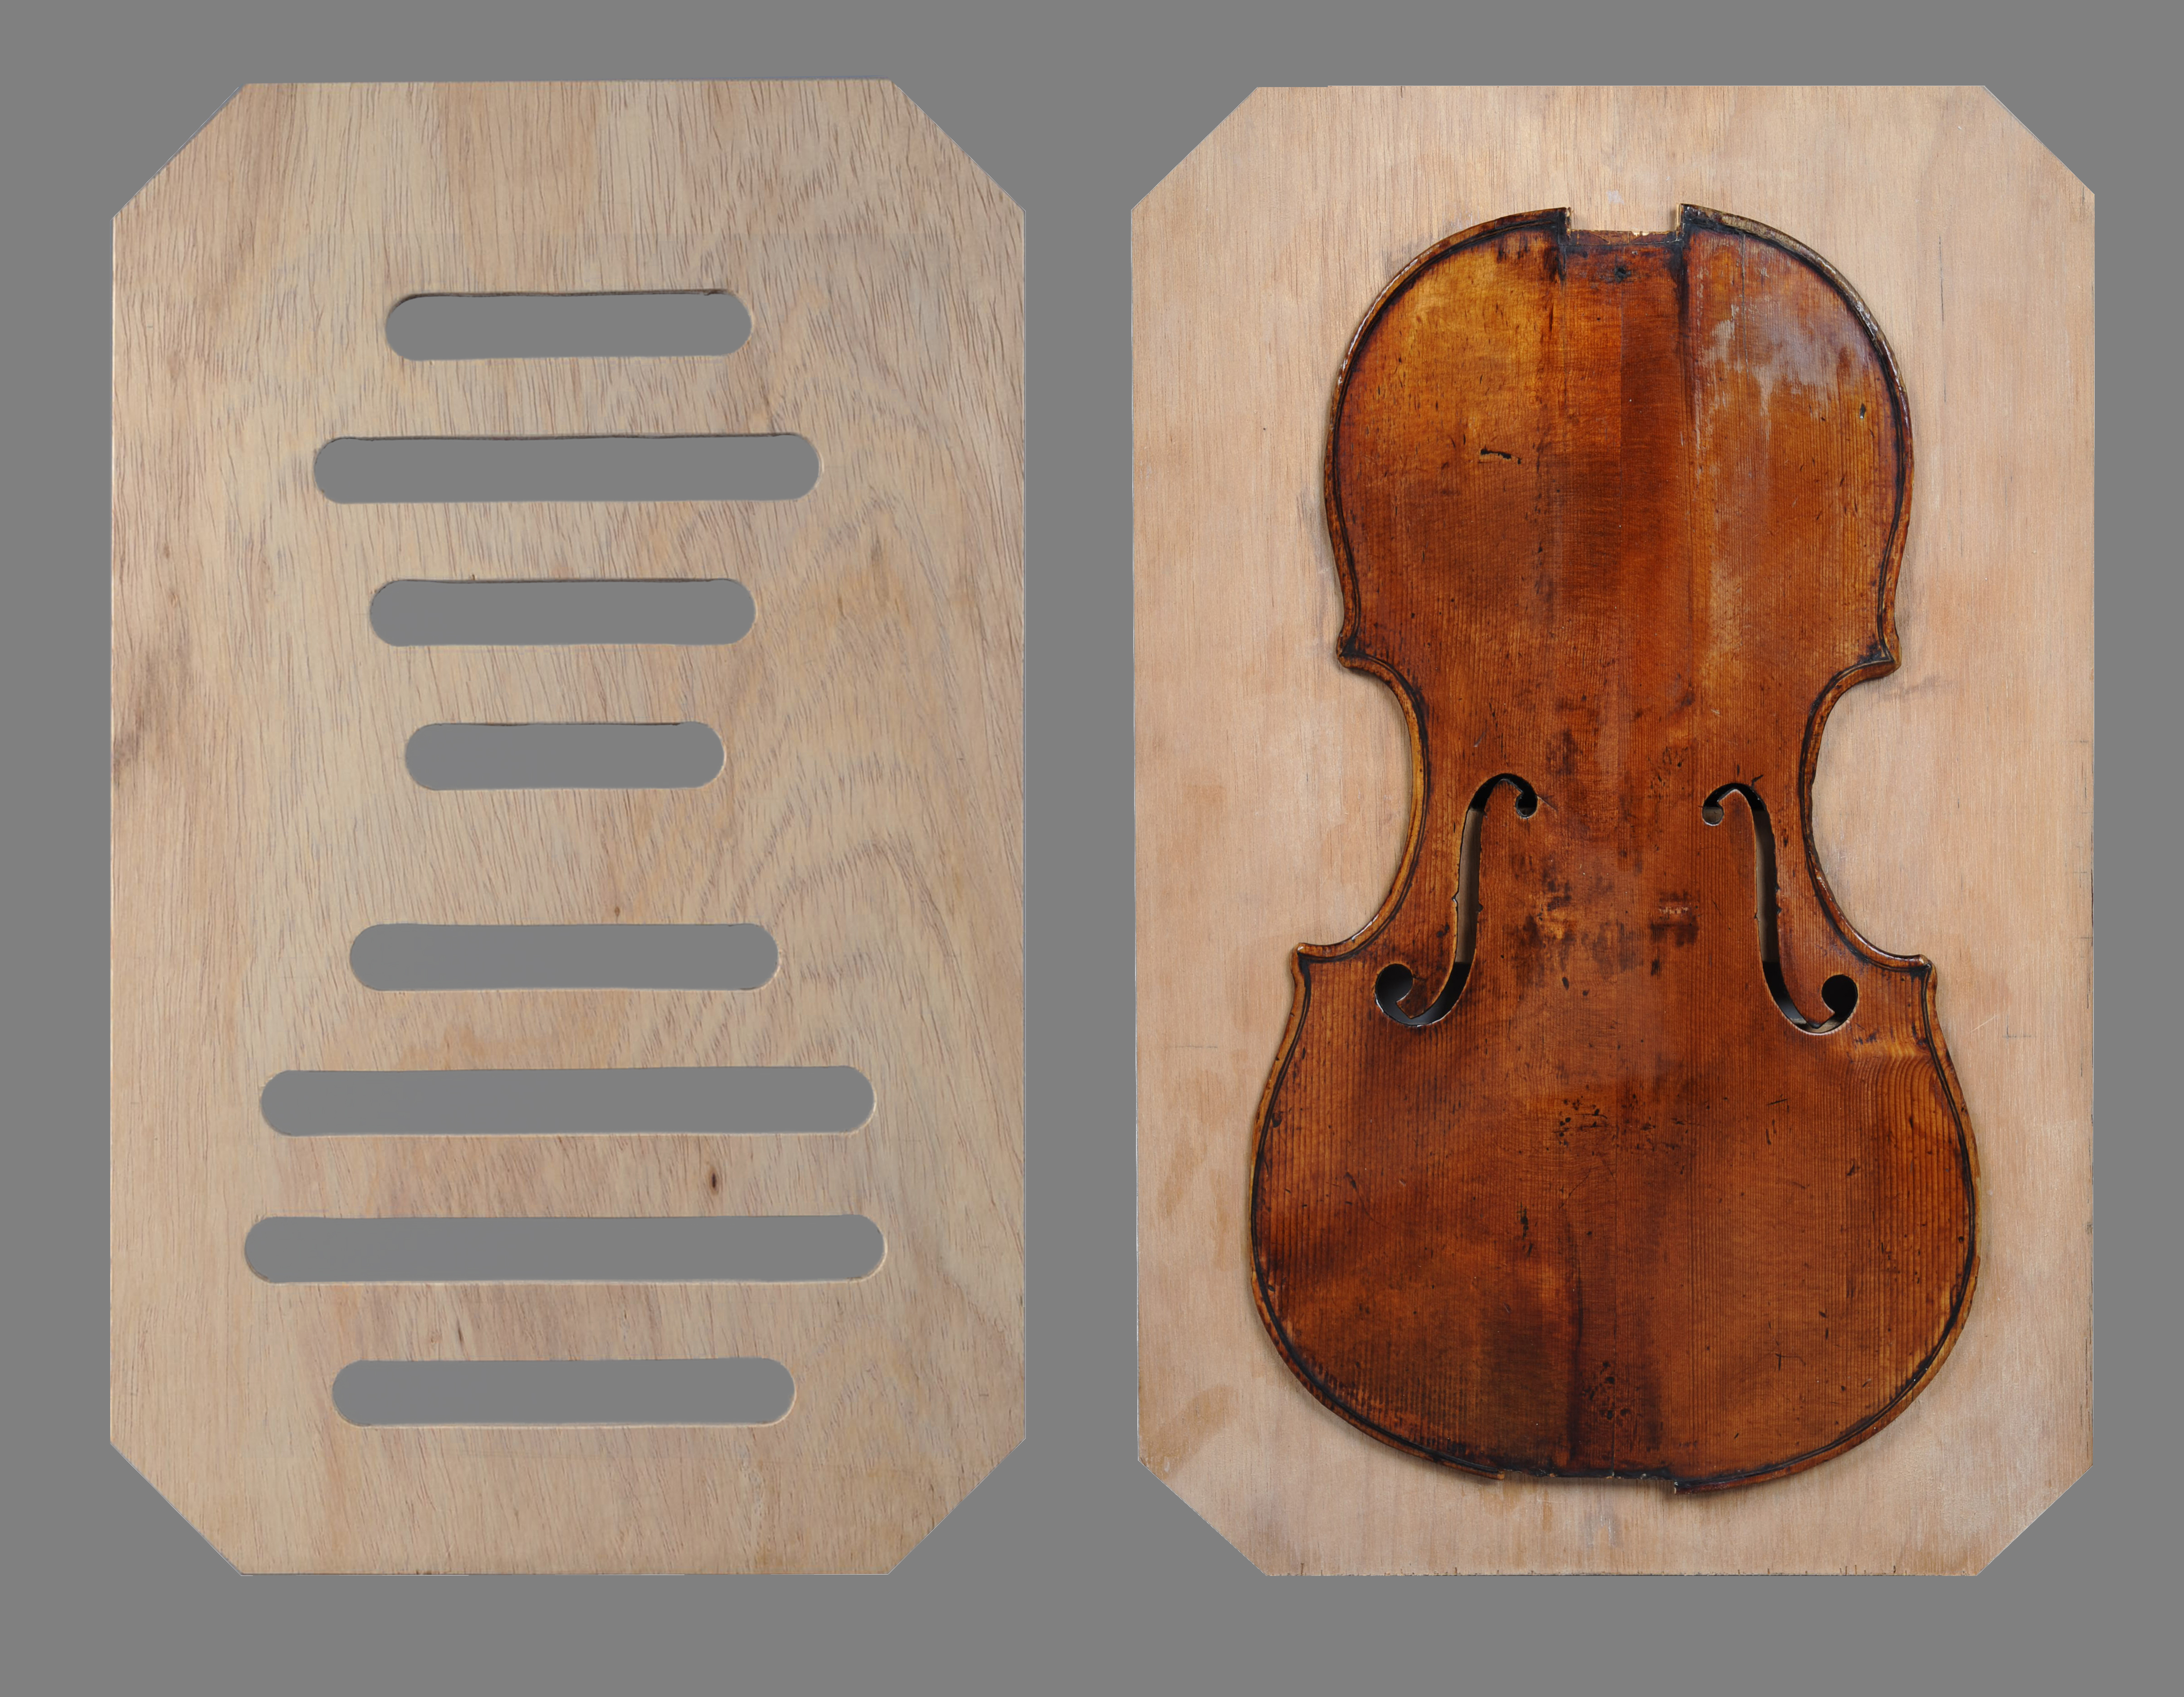
Fig. 1 Board with holes through which to insert the wedges
3. The Wedges
Determine and mark the sunken areas on a drawing on a separate sheet of paper. Use a ruler, a contour gauge, and slide a finger across the arching to feel any irregularities.
Insert wedges from underneath through the holes in the board. When pushed into position, the wedges should rectify the sunken areas of the arching
Take the greatest care when pushing the wedges, as too much pressure can cause a crack. Fit the wedges to the shape of the plate and round the edges that are facing the plate. Use a piece of cardboard between the wedge and the violin plate to further protect the latter from damage. Use crooked pliers to slide the wedges into position and recheck the arching after every inserted wedge. Fill the space between the violin plate and the board with rice or lentils, then place the board on a second board made permeable by drilling small holes, and turn it over. Finally stretch cling film over the plate and attach it with adhesive tape.

Fig. 2 Inserting the wedges with rounded edges, and inserting protective cardboard
The space between the plate and the board is then filled with lentils (turn the board over for this step), which will make sure the plate is stable in the vacuum. Failing to fill the space might result in serous damage to the violin plate, it can collapse in the vacuum! See fig.4
Then another board with vent-holes is place on the cutout-board, to hold the lentils in place. Seal the sides with adhesive tape to prevent movement.
4. The Vacuum Box
The violin plate, glued onto the plywood board, is now placed onto the vacuum box, onto which the outer plaster mould will be placed. Secure everything with clamps.

Fig. 3 Vacuum Box with the slider detail and outer plaster mould ready for casting
Attach the vacuum cleaner, which will provide a weak vacuum. A small slider (see detail in Fig. 3) on the side regulates the amount of air which can enter the box and gives us perfect control of the strength of the vacuum. Keep the slider open when switching on the vacuum cleaner, then gradually close it until the cling film is attached to the whole plate.

Fig. 4 Vacuum box schema
5. Pouring the Plaster
Use a low expansion plaster (<0.1%) and prepare it in the usual manner. Some plasters can become very hot while hardening; in such a case separate plaster and violin plate immediately.
6. Drying Plaster, the Mineral Layer
Plaster is contaminated with minerals, which dissolve in water when preparing the plaster. When drying, the water deposits the minerals at the surface of the mould, and a hard layer is formed which is difficult to penetrate when correcting the mould. When doing sothe surface quickly gives way leaving soft, hollow indentations in the mould.
To avoid formation of the mineral layer, cover the plaster surface that faces the violin plate with cling-film and a sand-bag and suspend it for drying. The water will evaporate through the sides and the bottom of the plaster. This is where the hard layer will form, leaving the area we need to correct homogeneous.
7. The Base Plate
The hardened unsupported plaster is very fragile. Glue a plywood board underneath the plaster cast to create a composite mould. Cut a square plywood board and line the sides with adhesive tape, then pour in a thin layer of two-component plastic resin and place the plaster on top. After hardening cut the plywood back to the dimensions of the plaster. This process creates a composite material which is very strong and unlikely to crack.
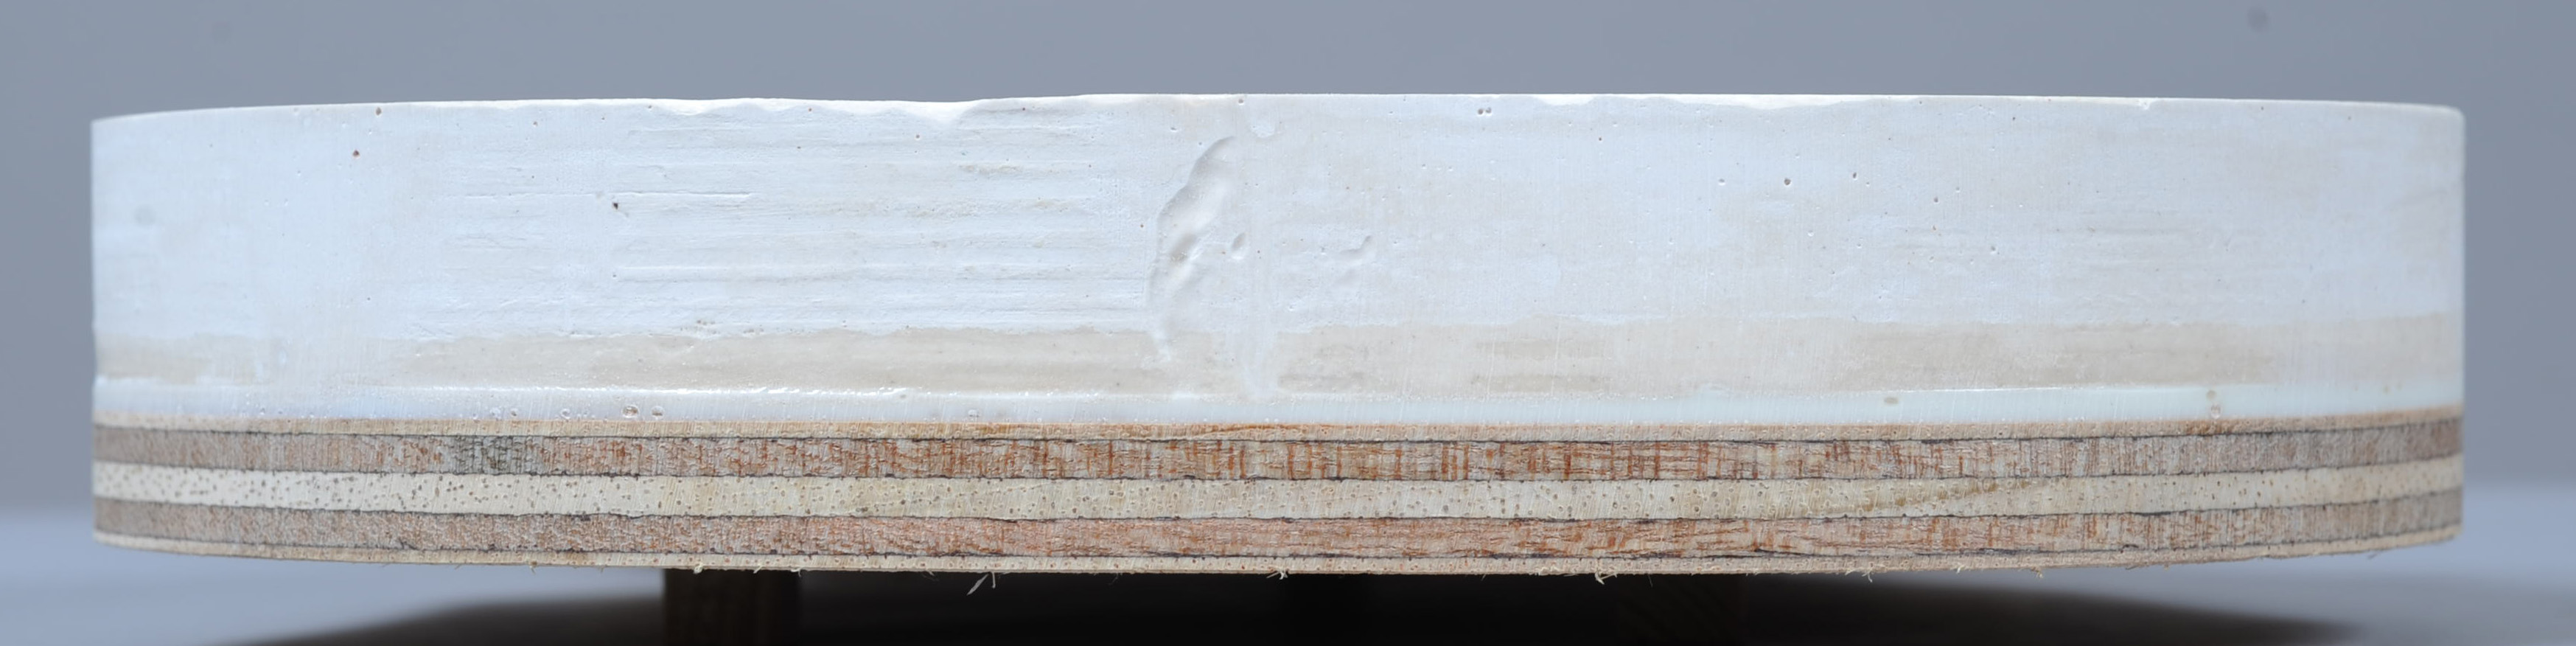
Fig. 5 Composite mould consisting of the plaster cast, plastic resin and plywood base
8. Correct the Plaster Cast
The plaster cast can be corrected with the tools we commonly use for shaping an arching on a new violin. Mark the areas that need improvement, then cut, scrape and sand.
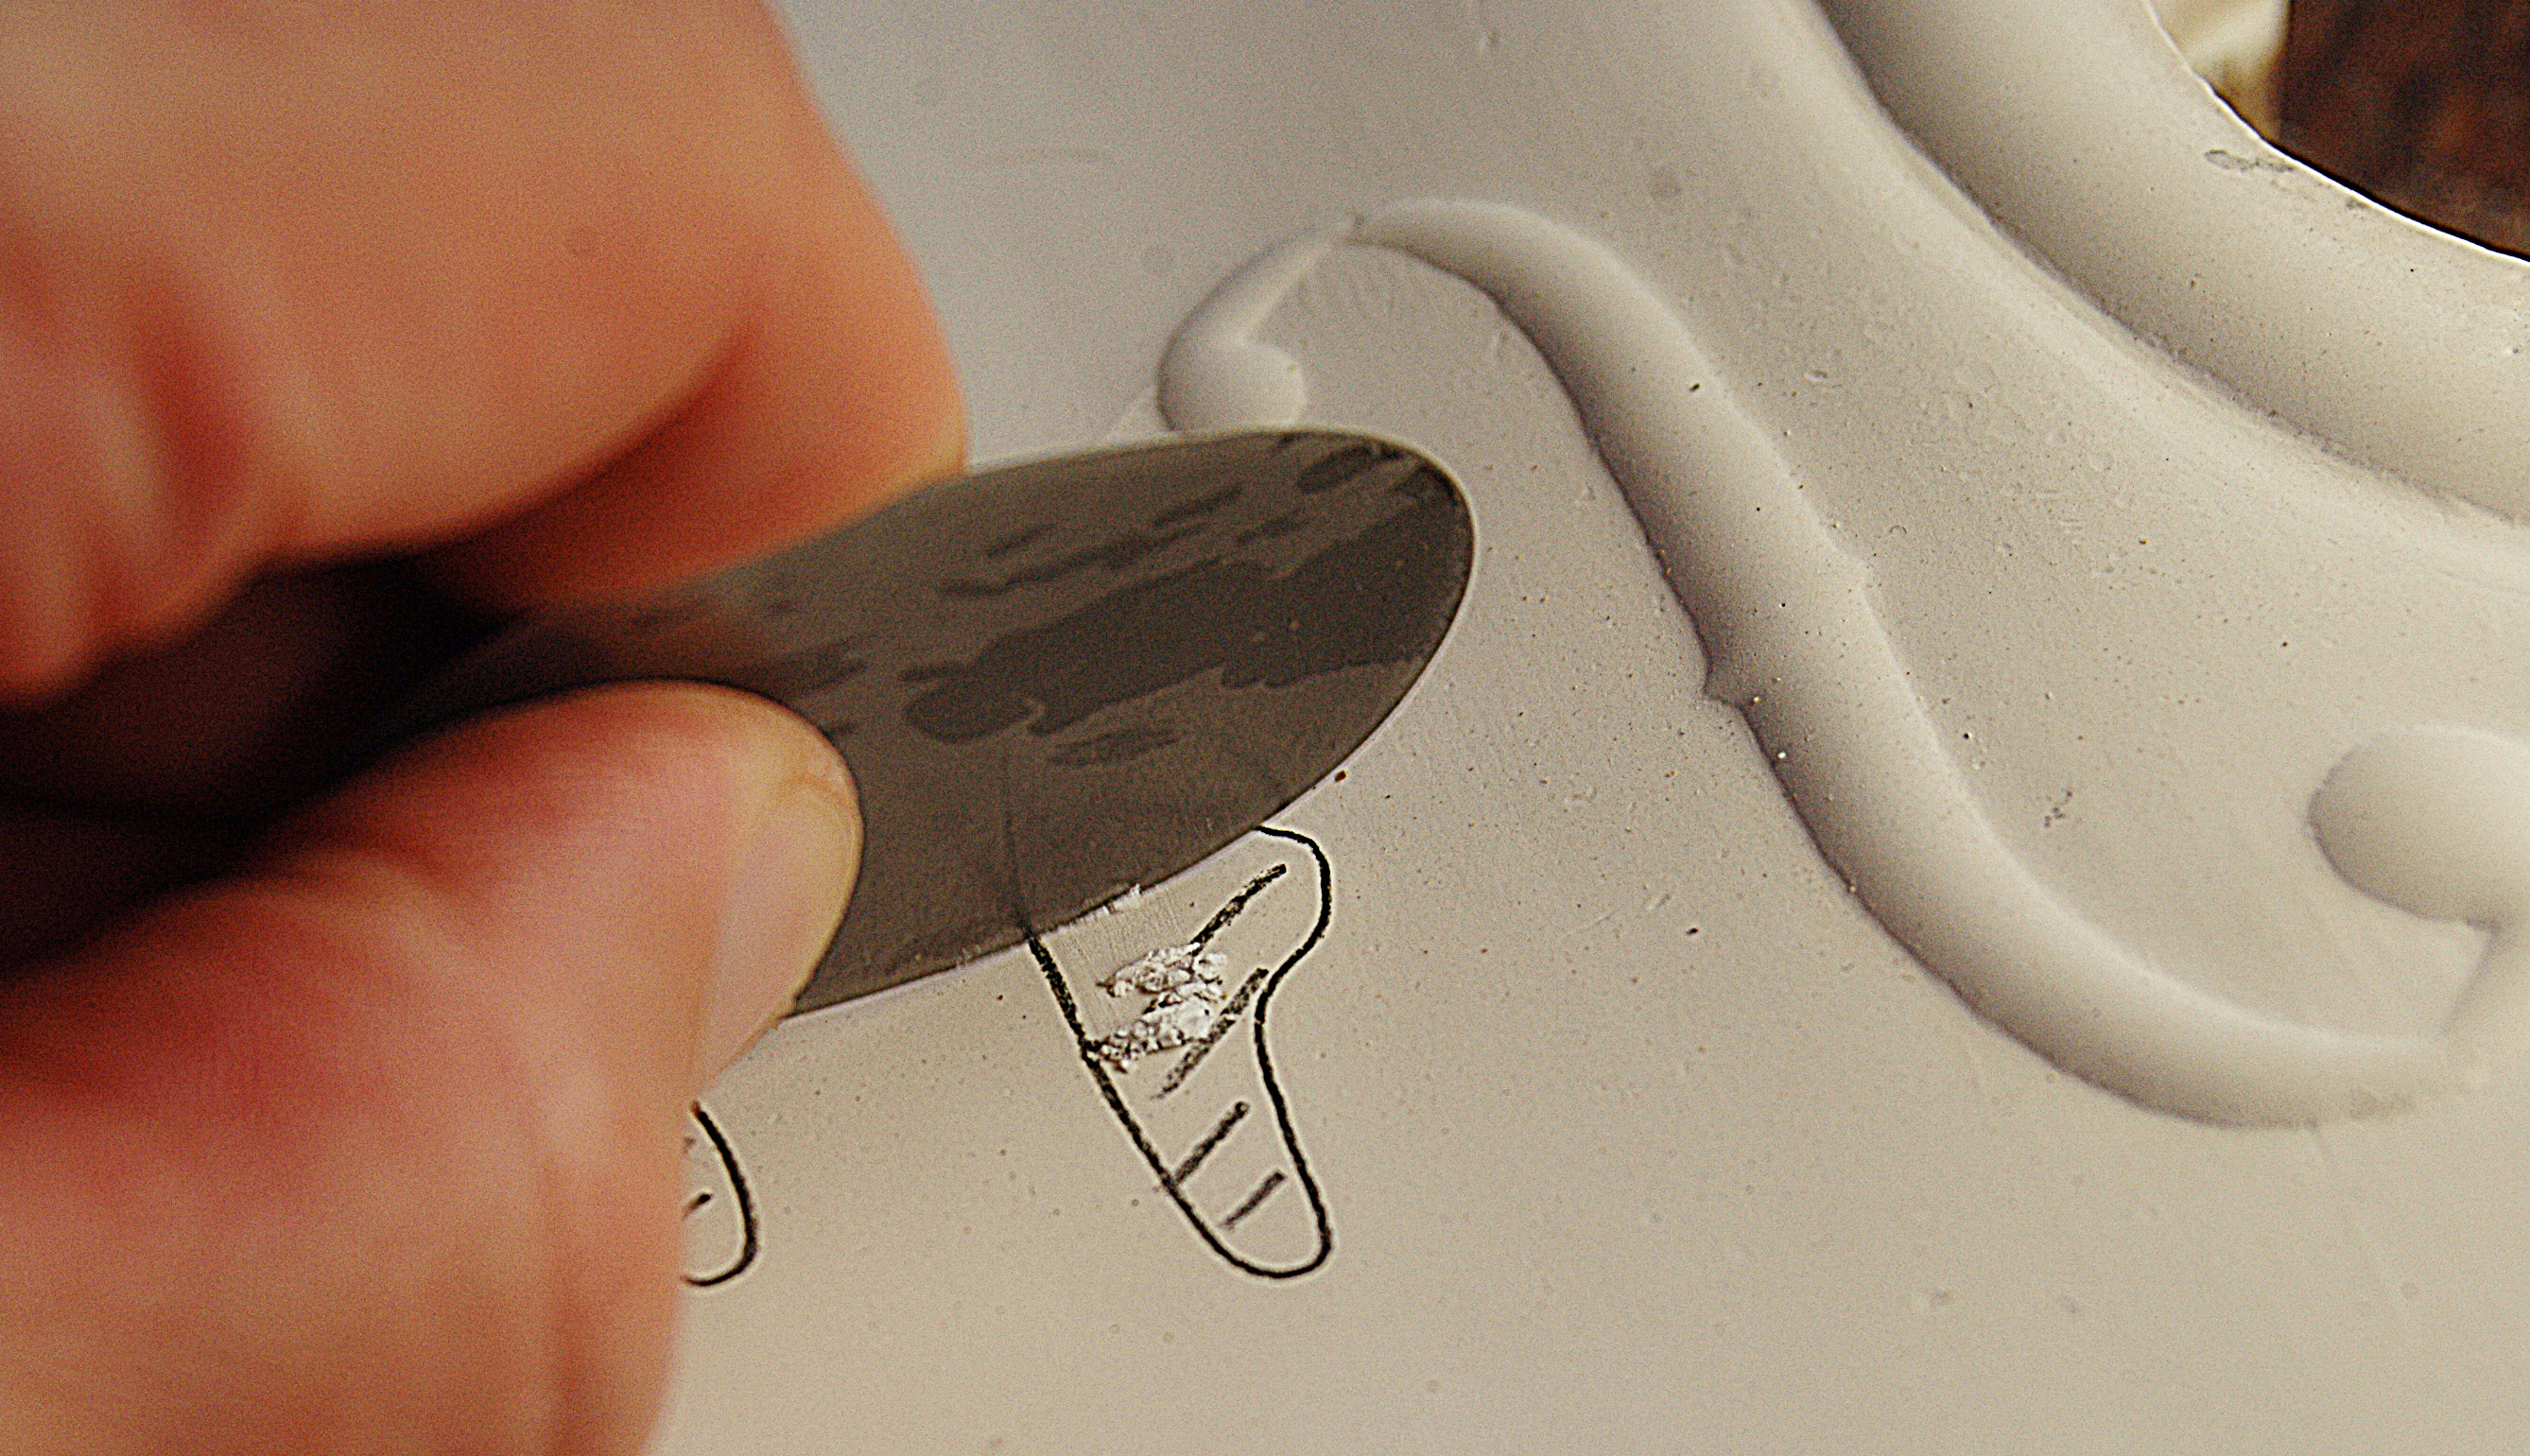
Fig.6 Correcting small imperfections
Take great care also to create enough space for the edge when correcting the area next to the purfling.

Fig.7 Creating space for the edge
7. Press the Arching
Every grain of dirt will damage the violin surface; we must therefore make sure the mould is free from debris. Clean it with a brush and line the plaster cast with cling-film. Carefully place the plate in the cast, making sure that it is in the correct position, and then clamp down the corners. Prepare cardboard or softwood strips. Wet the plate very slightly (this will enable it to bend more easily without the risk of cracking) and cover it with a second layer of cling film to prevent any dirt from entering the gap between plate and plaster cast. Place another layer of thick plastic foil onto the violin plate to protect its surface from the imprint of the sand bags. Place the cardboard strips on the violin and clamp it down slowly where necessary. Place hot sandbags between the strips.

Fig.8 Plaster cast with sandbags
The sand should be such a temperature that you can still tolerate the bag on the back of your hand. Replace the hot sand every few hours. After a few repetitions you can press down the bags with slight clamp pressure.

Fig.9 Plaster cast with clamps
Change the sand on a daily basis, and after a few weeks the process is complete.
© 2010 Christian Schabbon

You must be logged in to post a comment.